Congratulations on your shave ice attachment — now register it with us
Your user manual is ready to download. Register your shave ice attachment with us so you can get help quickly if you ever need it. Let's get started!
What can I make with my new shave ice attachment?
Your mixer is about to be transformed into a magical shave ice maker, so you can have fun experimenting with textures and flavours. Create delicious shave ice recipes at home — look at what you can make...

Fluffy shaved ice
Light, yummy and perfect for a hot day. This delectable dessert is often topped with syrups and flavourings before serving.

Refreshing granita
Granita originates in Sicily! Create your own flavour combinations with this famous texture that's flaky and crystalised.

Acai shave ice
A twist on the popular tropical treat... enjoy all that wonderful goodness with a shave ice format.

Icy cocktails
So glamorous! Experiment with your own cocktails by making them with the shave ice attachment.
How to plug in your attachment

Remove the hub knob
Turn the mixer OFF (0) and remove the bowl. On a tilt-head mixer, unscrew the hub cover to remove it. On a bowl-lift mixer, flip up the hub cover to open it.

Insert your attachment
Insert the attachment into the hub, making sure the power shaft fits into the square socket. You may have to rotate it back and forth slightly. The pin fits into the notch when in the proper position.

Tighten the hub knob
Tighten up the attachment hub knob until the mixer is completely secured to the mixer. It’s now ready to start!
What are the parts of the attachment?
Your shave ice attachment comes with two different blades, so you can choose how coarse or fine you want your shavings to be.

Coarse blade
Select the coarse blade when you want crushed ice for different recipes.

Fine blade
Pick the fine blade when you want a powdering consistency, like snow.
How to make your first shave ice
Now for some icy creations! Remember that it's important to temper the ice pucks (in step 2 below). This means allowing the ice to adjust at room temperature until it gets a glossy, wet look and is clear from all sides. Tempering helps to make light and fluffy shave ice. Many factors determine how long it takes, but ice is usually ready to use within 10 minutes.

Prepare your ice puck
Fill the ice mold with water or a flavoured-ice base mixture of your choice. Make sure you don't pass the fill line. Fix the lid to the top of the mold and place it in the freezer for 12-24 hours.

Let it freeze!
After removing the molds from the freezer, press firmly on the bottom and sides to help release the ice puck. For ice-only recipes, allow the ice to rest for up to 10 minutes - this is called “Tempering” and helps to achieve the best results.

Choose your blade
Before starting, check that the upper lever of the housing is rotated all the way to the left. Remove the ice cup from the housing and select your blade.

Insert the puck
Time to insert your prepared ice puck. Be sure to insert it with the cross hatches facing upwards. Attach the detachable ice cup to the bottom side of the main housing.

Shave away!
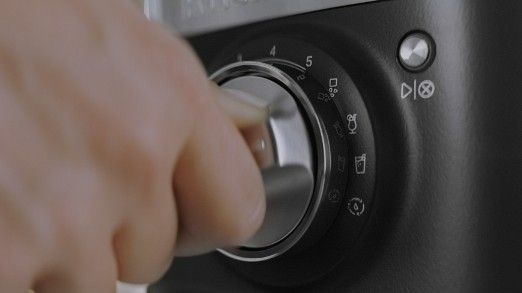
Place a serving dish underneath the attachment ready to catch the ice. Release the top lever by gently rotating it to the right and start shaving at Speed 10. You may want to rotate the dish as the ice falls to create a lovely cone-shaped mound.
Freezing time varies and depends on both the temperature of your freezer, and the sugar or alcohol content of your mixture. Recipes with alcohol should not exceed 8% alcohol to help ensure the mixture freezes hard enough to shave.
How to clean your shave ice attachment
Keep your shave ice attachment in tip top condition for a long time to come! Just make sure you thoroughly clean and dry it each time it's used.

Take the unit apart
Remove the ice cup from the housing by rotating it to the right and pulling downwards. Take note of the small indicator arrow which must line up with the lock / unlock symbols on the housing.

Hand wash the housing
Do not immerse the housing in water or other liquid. Wipe clean with a warm, damp cloth, and dry with a soft cloth before re-use or storing. Or, clean in warm sudsy water and rinse before drying.

Dishwasher-safe parts
The detachable ice cup, fine and coarse blades, ice molds, ice cup pusher, sleeve and lids can all be washed in the top rack of the dishwasher.