
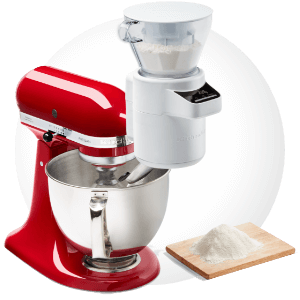
Tools
Ingredients
500+200 g strong white bread flour
2 g instant or active dry yeast
300 ml cold water
200 ml water
12 g kosher salt
Step by step
PREPARE POOLISH: Put flour in a bowl and sprinkle yeast over it. With a hand whisk, mix to incorporate. Add water and whisk until velvety smooth. Use a spatula to scrape down any mixture on the walls of the bowl.
Cover bowl with plastic wrap and let sit out at room temperature for 8 or 9 hours. Starter will visibly expand and become bubbly. The surface should be covered in bubbles and jiggle when you tap the bowl.
MAKE DOUGH: Add 200ml water to poolish and give it a good stir.
Attach Sifter + Scale and Whip to your Stand Mixer. Direct swivel chute into the mixer bowl. Use scale to measure 500g flour and 2g salt. Release ingredient valve and set Stand Mixer to Speed 1 to sift dry ingredients into bowl while whisking them together.
Remove Sifter + Scale and replace Whip with Dough Hook. Pour the poolish and water mix into dry ingredients. Knead for 2 to 3 minutes on Speed 2, until dry flour is fully incorporated and dough looks sticky. At this stage, the dough is unfinished and will not be smooth. Remove the dough and put in a separate bowl.
PROOF DOUGH: Cover bowl with plastic wrap. Let dough rise 45 minutes for the first proof.
Wet your hands and work surface by dipping your hands in lukewarm water and sliding them along your countertop or “bench”. This will help keep the dough from sticking.
Scrape dough out of the bowl and “knock back” by lifting the dough with both hands and letting gravity stretch the dough to the surface. Now, fold it in half to make one elongated piece. Rotate dough one turn to the left and repeat folding and rotating, about 6 times total, wetting your hands as needed to prevent sticking. You will notice the dough getting smoother as you work. Make sure you scrape up any dough sticking to the countertop.
Return dough to bowl and cover with plastic wrap. Let dough rise 45 minutes for the second proof.
While dough rises, spread out a large kitchen towel on your work surface and place a sheet of parchment on top. Dust parchment with a little flour and set aside.
DIVIDE DOUGH: Lightly flour your work surface. Scrape dough onto the floured surface. Sprinkle additional flour on top of the dough. Divide it into 4 equal portions.
Pre-shape each baguette. Gently tap the dough portions with your fingertips into a rough 15 cm rectangle. Tap just enough to spread it out — you don’t want to push out the air. Slightly fold the top two corners of the rectangle toward the center. Then lift the top half and tightly roll it halfway down the rectangle. At this halfway point, pull both sides of the dough towards the middle again, press it in and now continue your original roll all the way down this time. You should have a tightly rolled up 15cm tube with rounded ends ideally with only 1 visible seam that should lay on the bottom. Line up baguettes without them touching, keeping the seams on the bottom. Cover with a sheet of oiled plastic wrap and let rest 15 minutes.
Place baking stone in oven on middle rack and preheat to 250°C for at least 45 minutes. Place a cast iron skillet on the bottom rack. You will fill this with water when you put your epis in.
ROLL INTO BAGUETTES: Clean work surface and lightly sift flour across the top. Uncover the first baguette and lightly sift some flour on top of it. Place it top side down on the countertop so the top is now the bottom. Gently tap the dough without pressing out the air into a nice oval shape about 15 to 20cm wide. Fold the bottom third of the oval up . Then fold the top third down over that and press gently with the heel of your thumb to seal. Flip dough 180 degrees. Starting from right to left, pinch the top of the dough and pull it down over the seam all along the baguette. Press the seam with the heel of your thumb and flip the dough 180 degrees again. Repeat, pinching the top of the dough and pulling it down and over the seam all along the baguette. Roll so the final seam is facing toward you on the side of the baguette. With the heel of your thumb, firmly smack down along the seam only (not the top of the baguette) against the surface. This is your final sealing, and you are essentially using the surface to pinch it shut. Roll the baguette so the seam is on bottom. You should now have a raw baguette shape with rounded ends and no visible seams.
Roll the dough gently back and forth to elongate baguettes until they reach 40cm in length. If shorter, continue working from the middle and rolling outwards to elongate. You cannot shorten the baguettes once they are rolled out, so work carefully. Taper the ends a bit by pinching them out so they become pointy.
Once each baguette is formed, gently lift and lay seam side up on the floured parchment. Curl up the kitchen towel 5cm high along each length of the dough sides to create support walls. The dough should now be nestled in like a hot dog in a bun. Repeat with all four baguettes. Cover with a tea towel or kitchen towel and let them proof for 30 minutes.
CUT WHEAT SPIKES: Lay two baguettes seam side down on an oiled half-sheet pan.
Use scissors to cut wheat spikes. Hold scissors at a very low angle, 45 degrees or less and cut through the width of the baguette every 2 to 3cm from the tip of the last cut mark. Only cut 90% of the way through the baguette. The last 10% will hold the loaf together. Once you make each cut, push the wheat spikes to alternating sides.
BAKE EPIS: Set sheet pan with epi loaves directly onto the preheated baking stone. Protect your face from rising steam by leaning away from oven opening and fill the empty hot cast iron pan with 1 cup of water. Lightly mist the whole oven with water using a clean squirt bottle. Baguettes love steam! Bake 10 minutes, then rotate pan for even cooking. Bake for another 6 minutes or until epis are golden in color to your liking.
If you would like more browning on your loaves, set the oven to broil to finish off your bread for 2 more minutes. Make sure you turn the oven back to bake before starting the next batch.
Repeat with remaining loaves. Let bread cool at least 15 minutes before serving and eating.